Installation Steps for biExport On-Premise
If you want to use biExport productively with an on-premise installation of the biExport service, these are the necessary configuration steps.
Software Requirements
The server, on which you install the biExport service, does not have to meet high system requirements. The basic requirements are:
- Windows Server OS
- 4 GB memory
- 2 core CPU
If you expect high productive usage, the number of CPU cores mainly drives performance. If exported PDFs contain a lot of pages with tabular data, it makes sense to think about a dedicated server with a GPU, in order to get the highest rendering performance. The export load can be distributed over several biExport service instances by the use of the biExport Load Balancer.
Installation
- Please register your user on www.biexcellence.com/register and tell us that you are interested in biExport for SAC. Also leave us a message that you would like to install the product on premise.
- After successful registration, you can find the downloads for your installation on www.biexcellence.com/downloads.
- Download the package biExport Widgets 4 SAC.
- Install the Widget as shown in this blog post.
- Download the package openbi Repository Server.
- Decompress the package and install it.
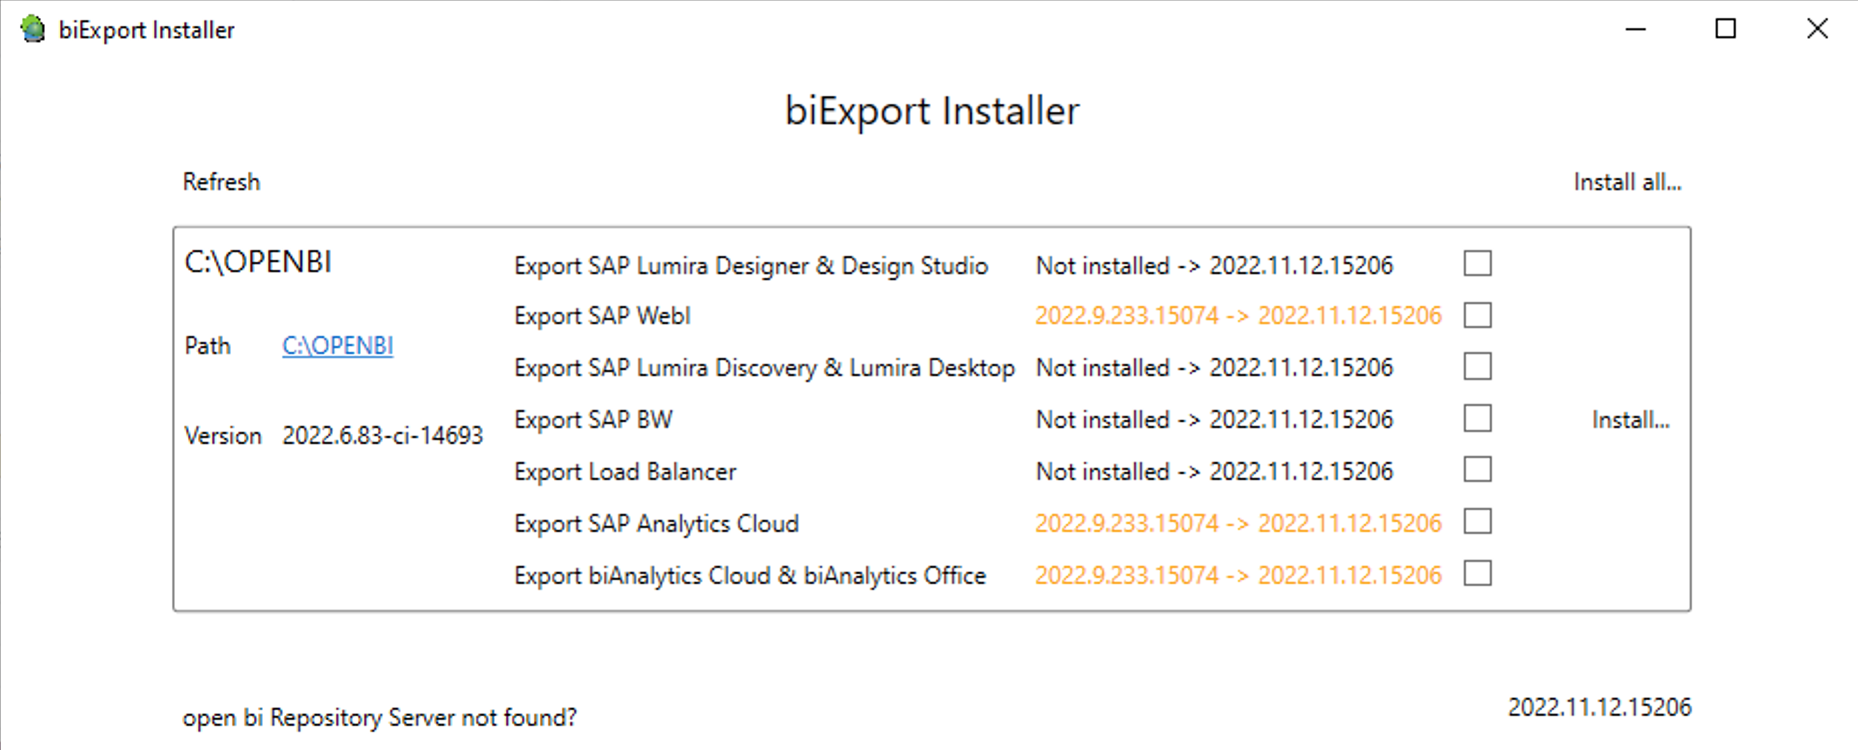
- Download the package biExport openbi Plugin Installer.
- Decompress the package and execute the EXE file.
- The Export openbi Plugin Installer automatically finds the open bi installation. From the Export group, choose SAP Analytics Cloud, and if you want to precalculate and publish SAC workbooks, also select the Analysis for Office Export Plugin. From the Publish group, select those Output Channels that you want to use. Then start the installation.
- Make sure the firewall does allow communication from and to the Export Service: Export Service uses the following ports by default:
9091    http
9092    https
9093    Configuration
Make sure these ports are not yet used by other applications and opened via the firewall, if you want to use them. You can also change the default ports in the Web Configurator. - Find the bi excellence openbi Repository service in the Windows Services and open it.
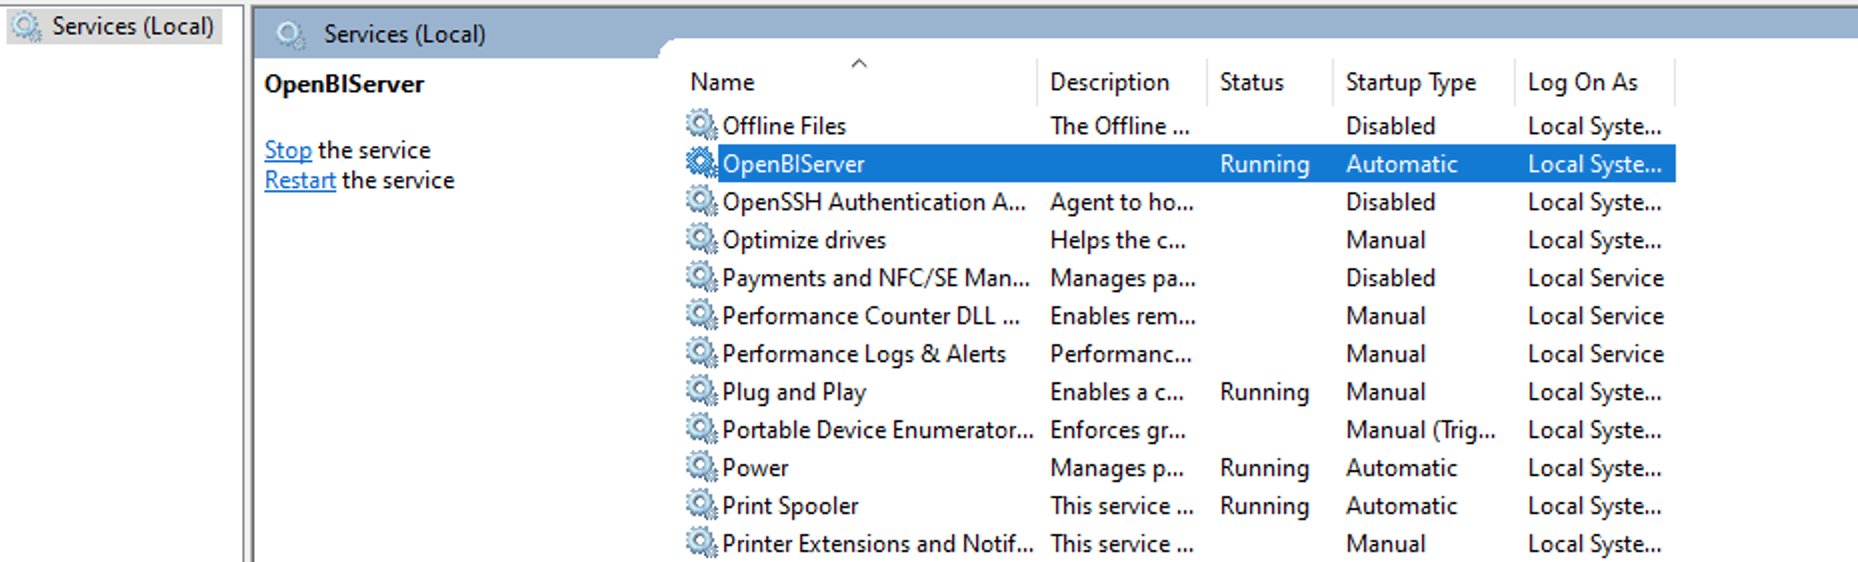
- Choose start automatically.

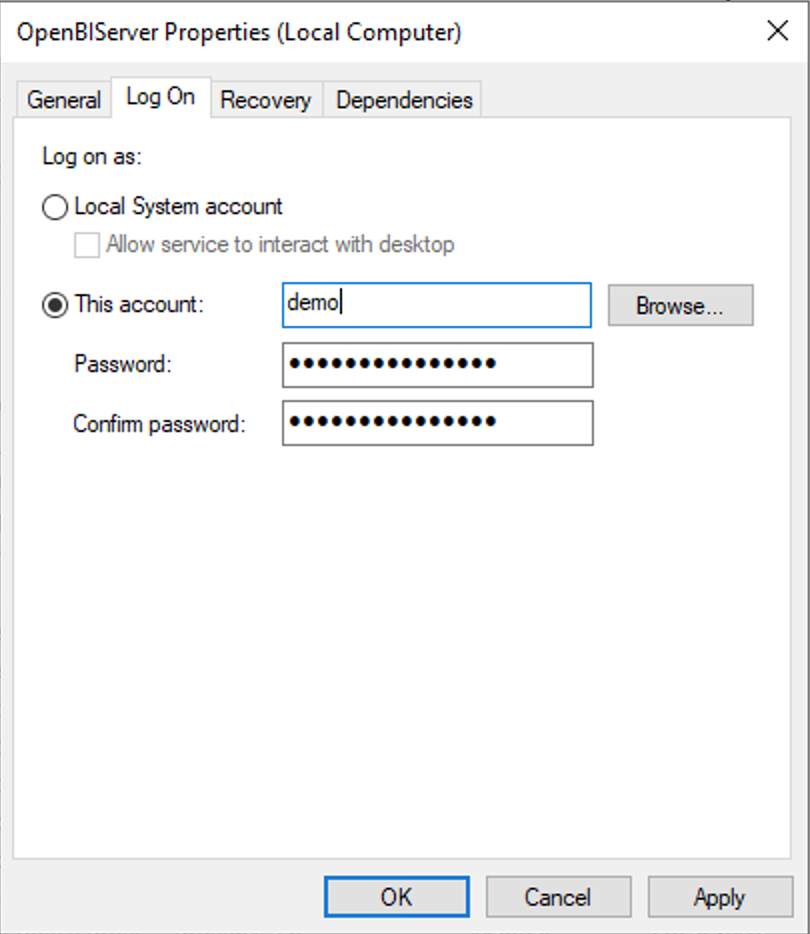
- If you are using live connections with SSO: We recommend to run the service with a user, who is authorized to access those Live Connections via SSO (for details read below).
- Start the service.
Configuration
You can configure and monitor the biExort service via configurator.biexcellence.com.
- Login to your server
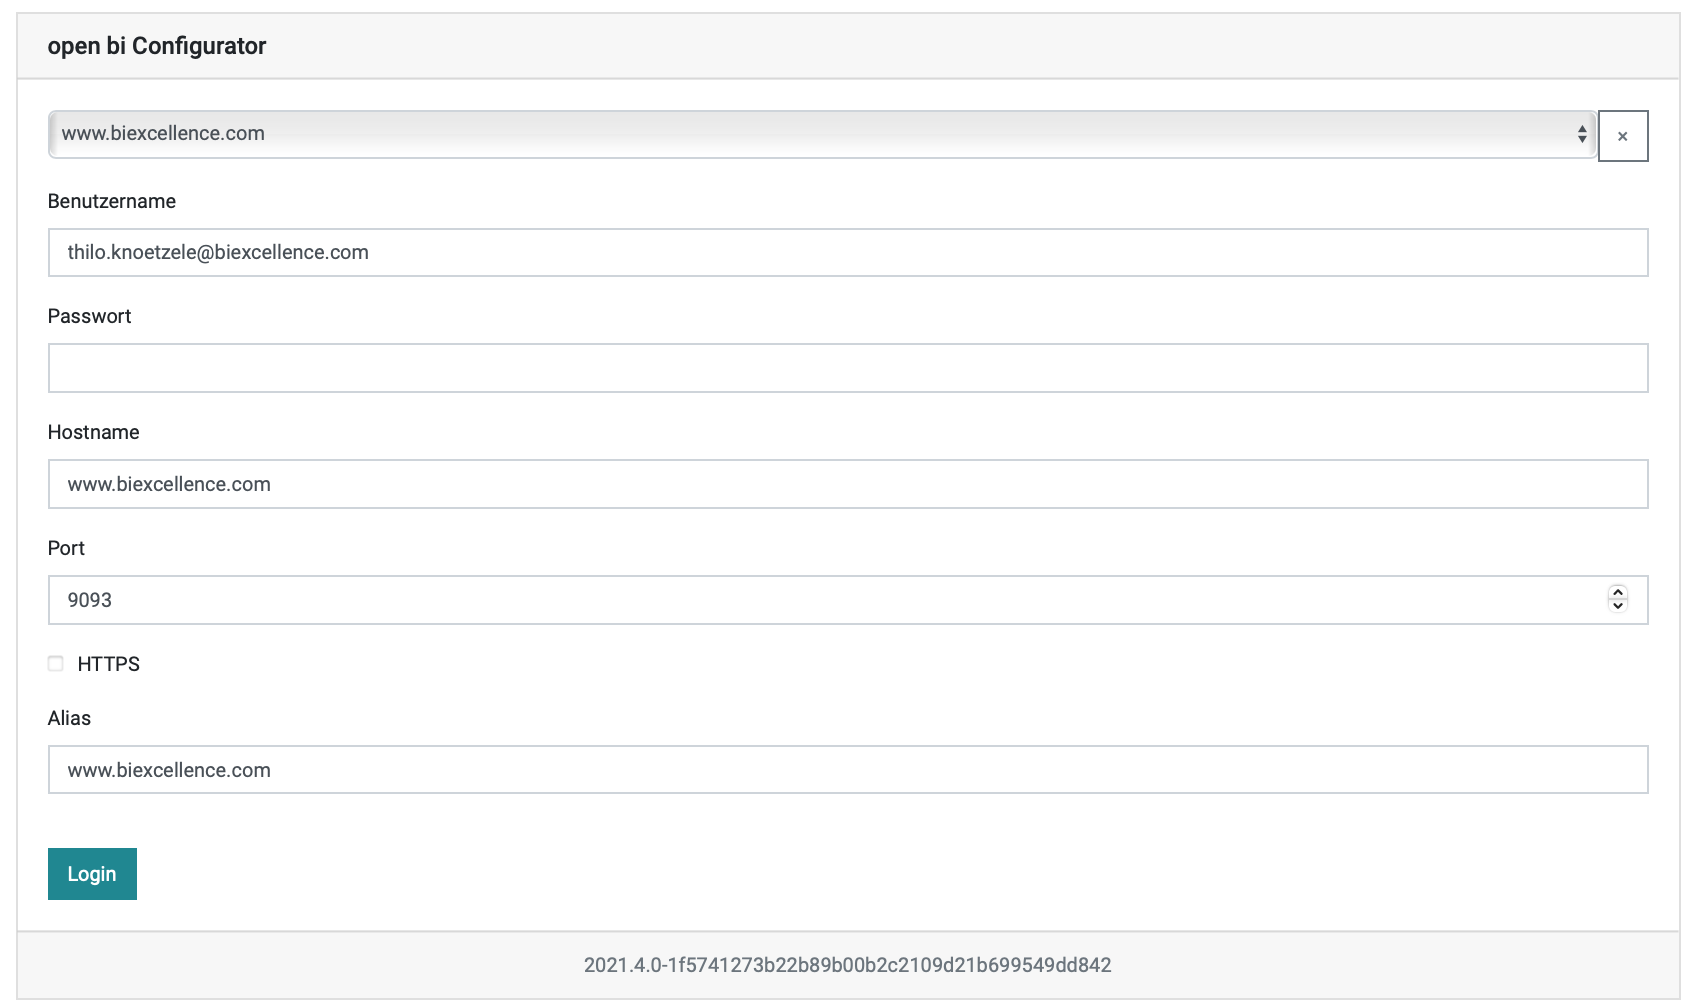 For the first login use user "admin" and password "Initial".
 - Navigate to Settings ...

... add the tracing parameter:
Name:            EXPORT_TRACE
on Productive Server:  ERRORS
on Development & Test: BASIC
for Support Cases:     X
(stores all trace files in the export_temp subdirectory of OPENBI installation)
... define how long biExport should wait for SAC stories to execute in background execution:
Name: EXPORT_TIMEOUT Value: 60000 - Activate https support
Open bi requires a PKCS#12/PFX (.pfx or .p12) server certificate, which includes any intermediate certificates and the private key in one encryptable file.
Commands to convert different certificate formats to PKCS#12/PFX using OpenSSL:
- Convert PEM to PFX:
$ openssl pkcs12 -export -out certificate.pfx -inkey privateKey.key -in certificate.crt -certfile CAcert.crt - Convert P7B to PFX:
$ openssl pkcs7 -print_certs -in certificate.p7b -out
certificate.cer
$ openssl pkcs12 -export -in certificate.cer -inkey privateKey.key
-out certificate.pfx -certfile CACert.cer
Install the certificate to the Windows Certificate Manager. Use Local Machine as store location and Personal as certificate store on the machine where the open bi Repository Server is installed.
In the Web Configurator navigate to Settings and add parameter SSLPath. Set the parameter value to the Common Name (CN) of the certificate.

Open bi will search for the certificate in the certificate store.
After changing this setting the service must be restarted! - Convert PEM to PFX:
- Internet Connection
The server, on which the biExport service is running, needs access to your SAC tenant and other resources used by SAC. This is in particular the case for PDF and image genaration, as well as the Briefing Book Generation and Scheduling scenarios (see below).
Ensure that the URL of your SAC Tenant, as well as sapui5.hana.ondemand.com, assets.sapanalytics.cloud and other resources that your SAC stories are using, are reachable from the server.
For pure online exports, you can still disconnect the server entirely from the Internet, in case you always activate the Parse CSS property in the biExport Widget!
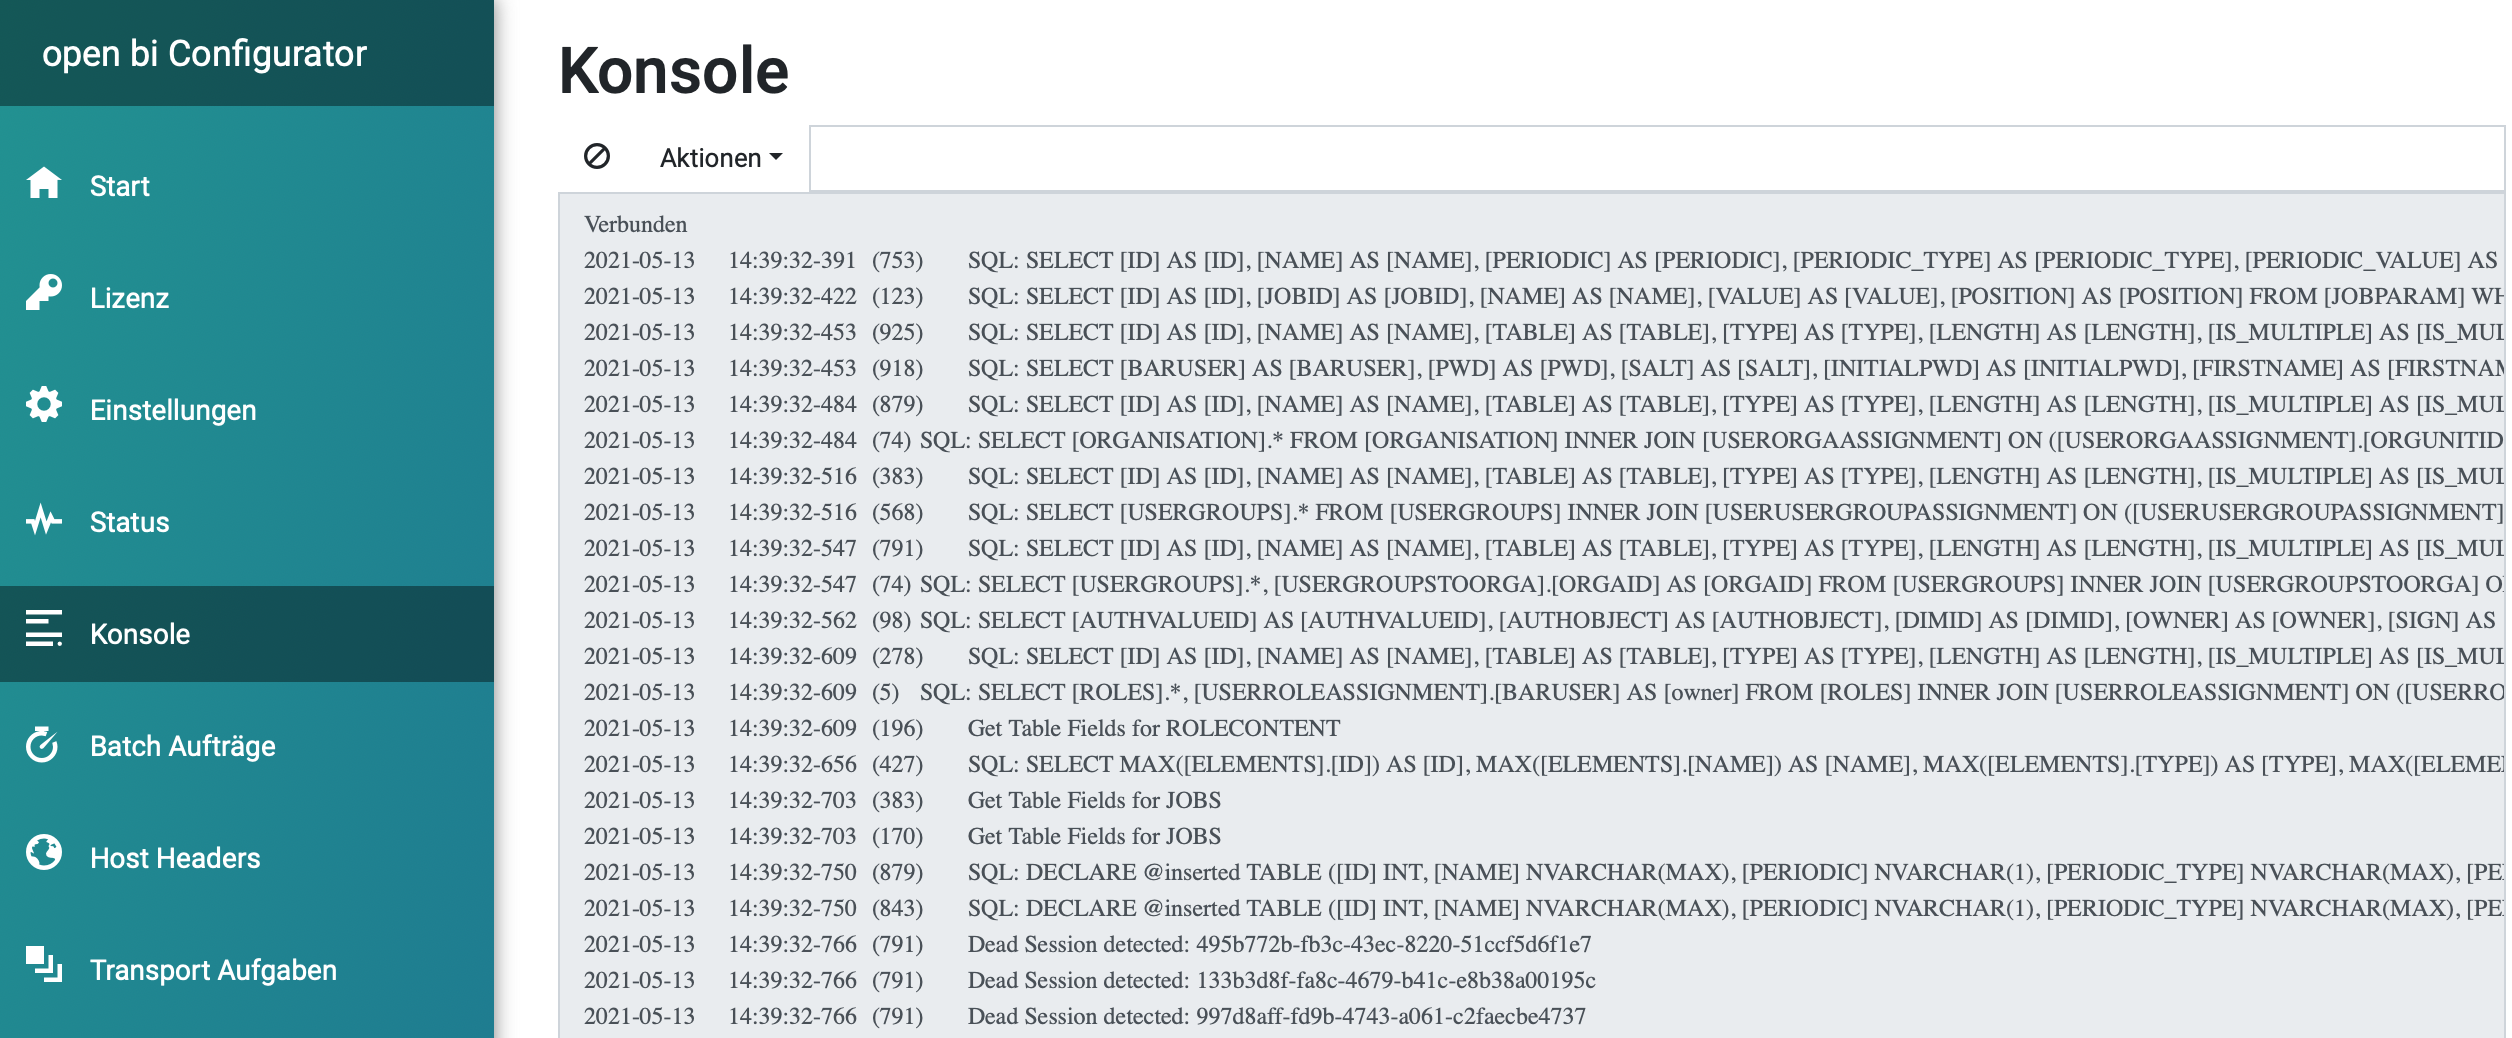
Otherwise, you will experience timeouts during the export process. - In the Console you can always check what the service is currently doing:
Test
Now the service should already be up and running. You can test it by calling the server UI from a browser - a login screen and CMS navigation should appear:
https://[your server URI]
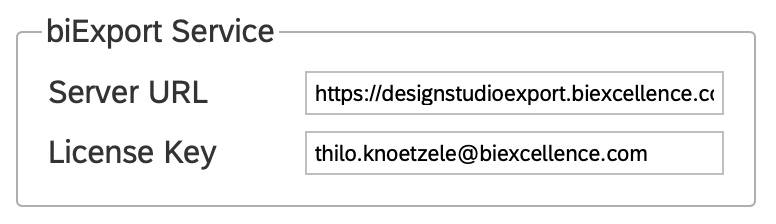
... set the Server URL to
https://[your server URI]
and you can test the first export. The License Key does not have to be entered in this scenario.
For Briefing Book Generation, Scheduling and Background Execution
- Configure oAuth on SAC
This step is not required if you are using SSO for logging in to SAC and Live Connections. For import models and live connections with popup authentication, follow this blog post for configuration instructions.
- Determine SAC tenant URL
The Tenant URL is displayed in the Background Execution parameter group of the biExport Widget
Alternatively you can open an SAC application in your web browser and activate the developer tools (F12). Enter the following scrpt into the console and press enter:
sap.fpa.ui.infra.service.AjaxHelper.getTenantUrl(false);Note down the result.
- Create a Connection Template for re-login
Connection Templates are created in the Web configurator.
After logging in, navigate to "Connection Templates", choose "SAP BO"...
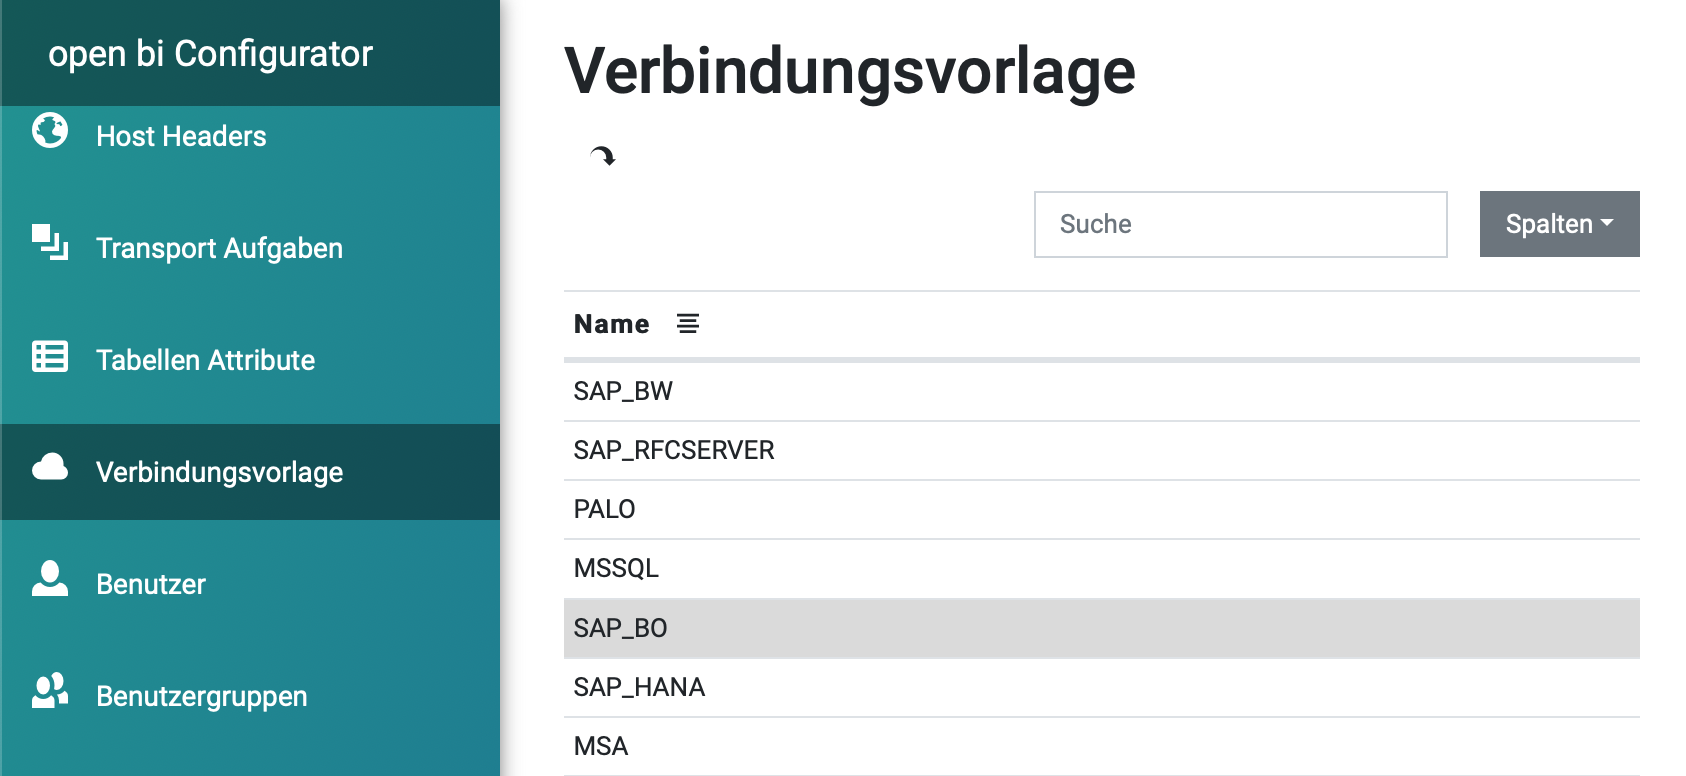
... and enter the following information:

For import model scenarios / Live Connections:
For Live Connection scenarios with SSO:
For Mail delivery
If you want to connect to your SMTP server, create the following parameters in the Web configurator:
For SSO
biExport supports SSO via OpenSSL and OpenID Connect.
OpenID can be activated as follows:
- Download the plugin for OpenID Connect from your Download Area
- Copy the files in folder „plugin“ to „OPENBI\httpserver\plugin“. Copy all other files directly into the OPENBI folder.
- Register the app for Entra ID, redirect URL /signin-oidc
- Open the <login> item in openbi Configurator. Replace the default login with:
<openbi:openidconnect data-client-id="..."
                      data-authorize-uri="..."
                      data-tpl-auth="auth"
                      data-tpl-unauth="unauth"
                      data-sso="X">
License
The evaluation license for the on premise installation is valid for 60 days.
Once you have successfully evaluated, you can start your license contract and we provide you with a license file that must be placed in the OPENBI installation folder.

Creation date: 13.05.2021
Category: Installation & Configuration
back to overview